


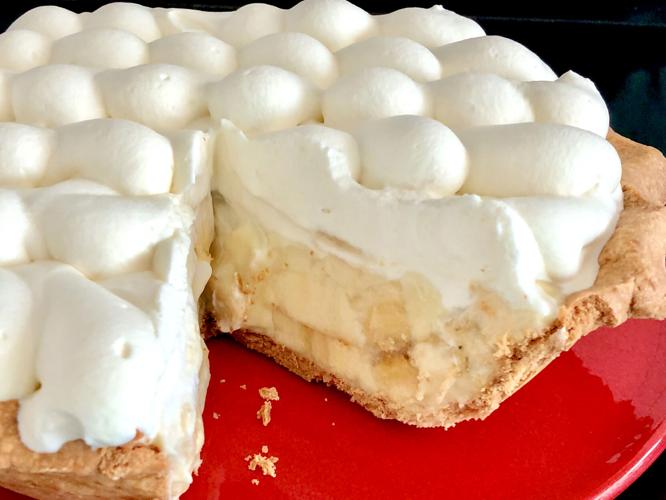
Banana Cream Pie
For me what adds to a great dessert is contrasting textures. This pie is a perfect example. As your fork enters the mound of whip cream it glides through effortlessly, then it’s slightly paused when it reaches the chunks of banana in the pastry cream and the final snap of the buttery crispy crust.
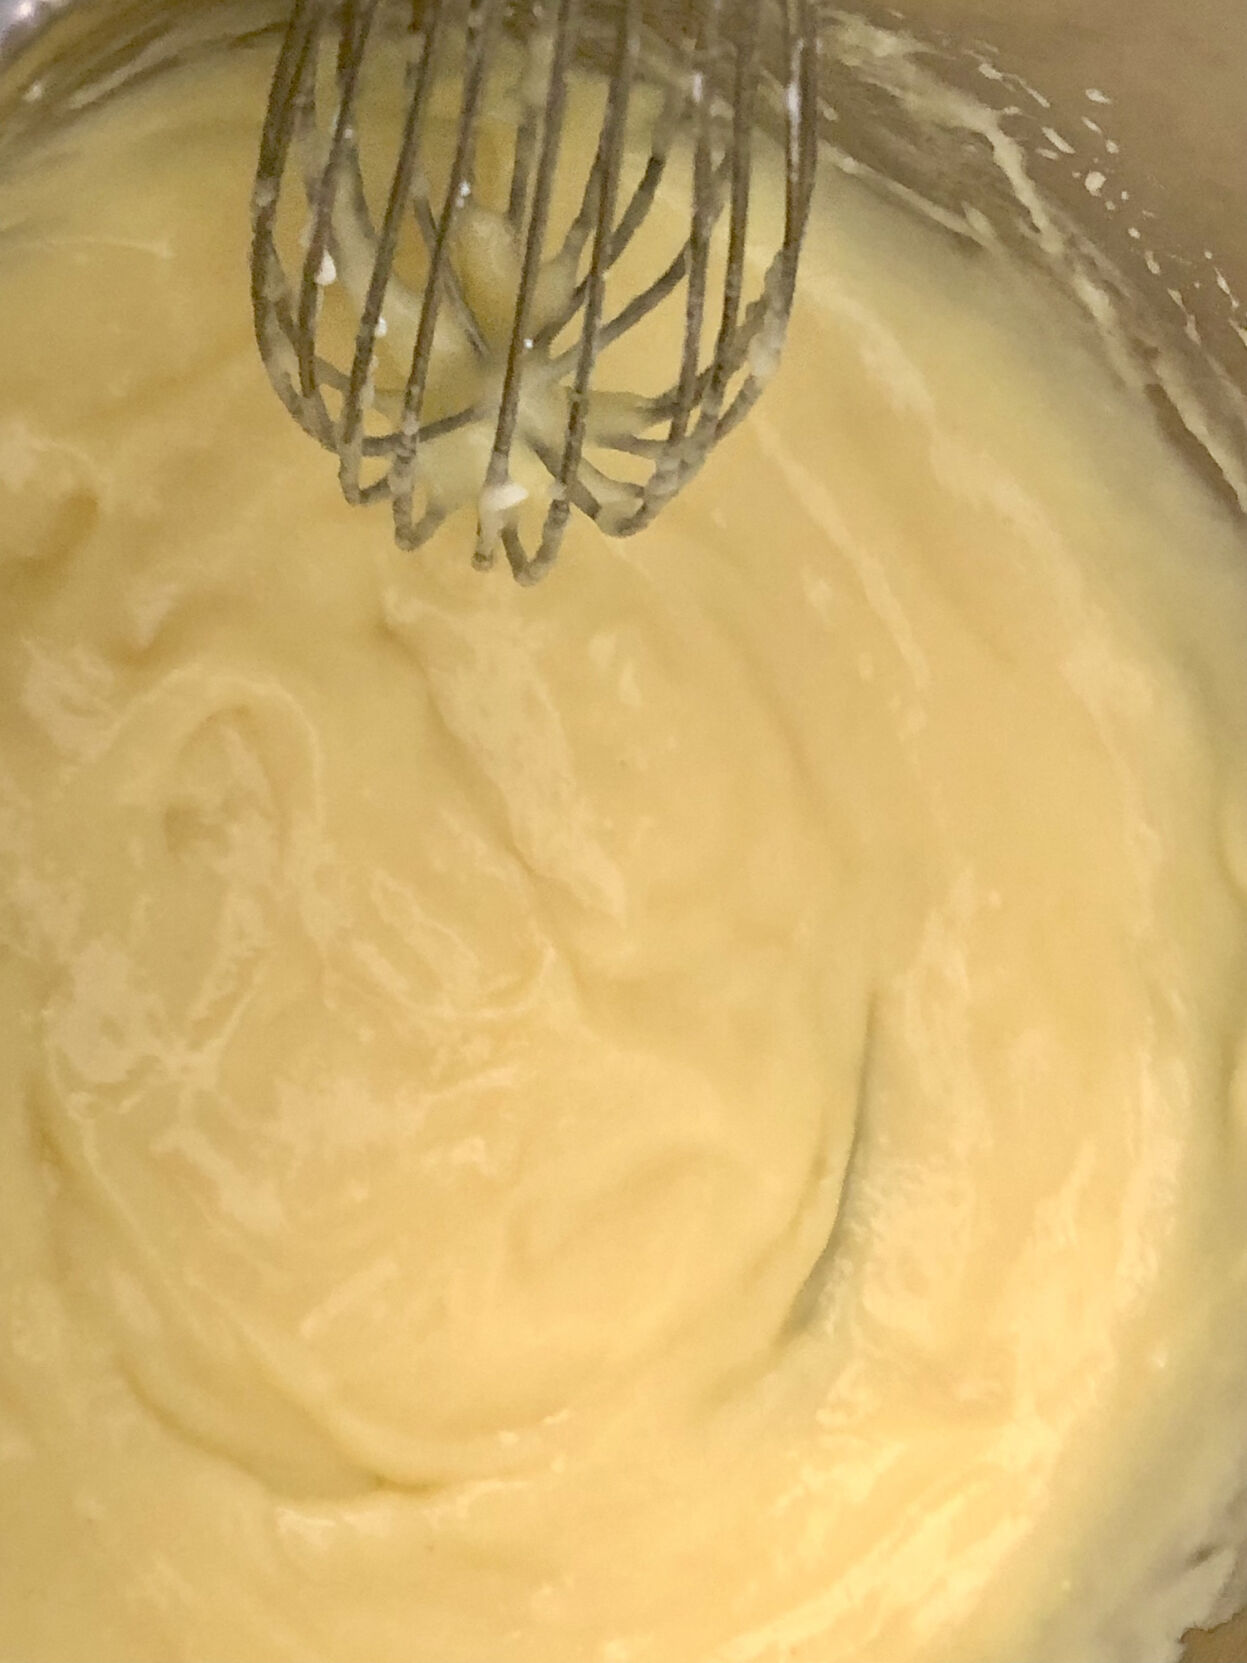
One of the greatest compliments I received was from the great French chef Pierre Troisgros. He was a guest chef at The Stanford Court Hotel in San Francisco and I was helping him with one of his desserts which included crème pâtissière (pastry cream). It’s a foundation recipe for any fine pastry kitchen which we made every day. After tasting mine he patted me on the shoulder and proclaimed it was the finest he had tasted in the US. In my recipe I use both flour and cornstarch, most recipes use just one of these. However if you use just cornstarch it will be thin, on the other hand if you use only flour it will be heavy. Using both is just the right balance. Instead of heating the butter with the milk, I stir it in at the end for a lighter, fresh butter flavor. This is the base for my banana cream pie.
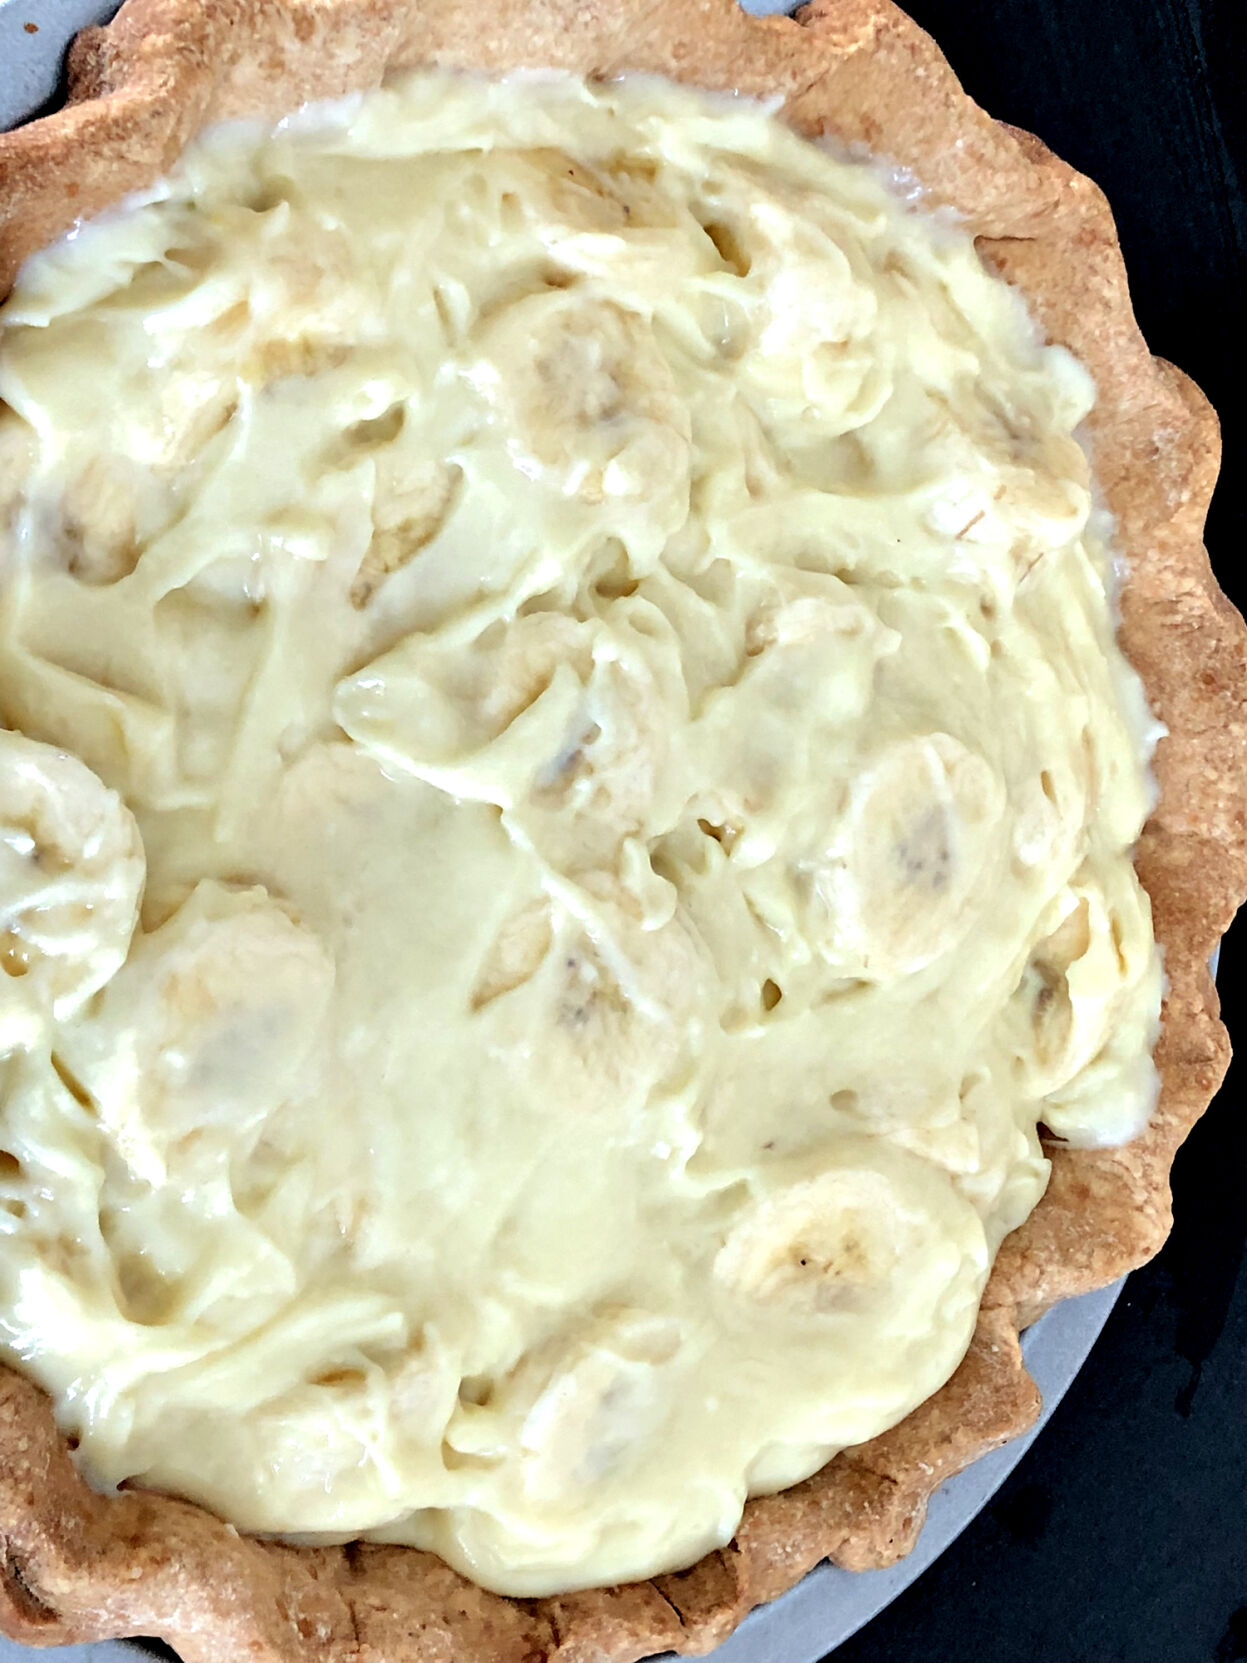
The other difference in this recipe is it doesn’t use banana flavor and instead is packed with bananas. The thick slices let you enjoy the banana's wonderful lush texture. It’s important to use green-tipped bananas which are slightly less ripe, they also will have fewer if any brown spots. The extra acidy in these less ripe bananas pairs better with the sweet pastry cream. Another benefit of using less ripe bananas is that they won't brown as easily, especially once they are folded into the warm pastry cream. When you blend the flour and cornstarch with the sugar it prevents them from getting lumpy when they are cooked in the milk.
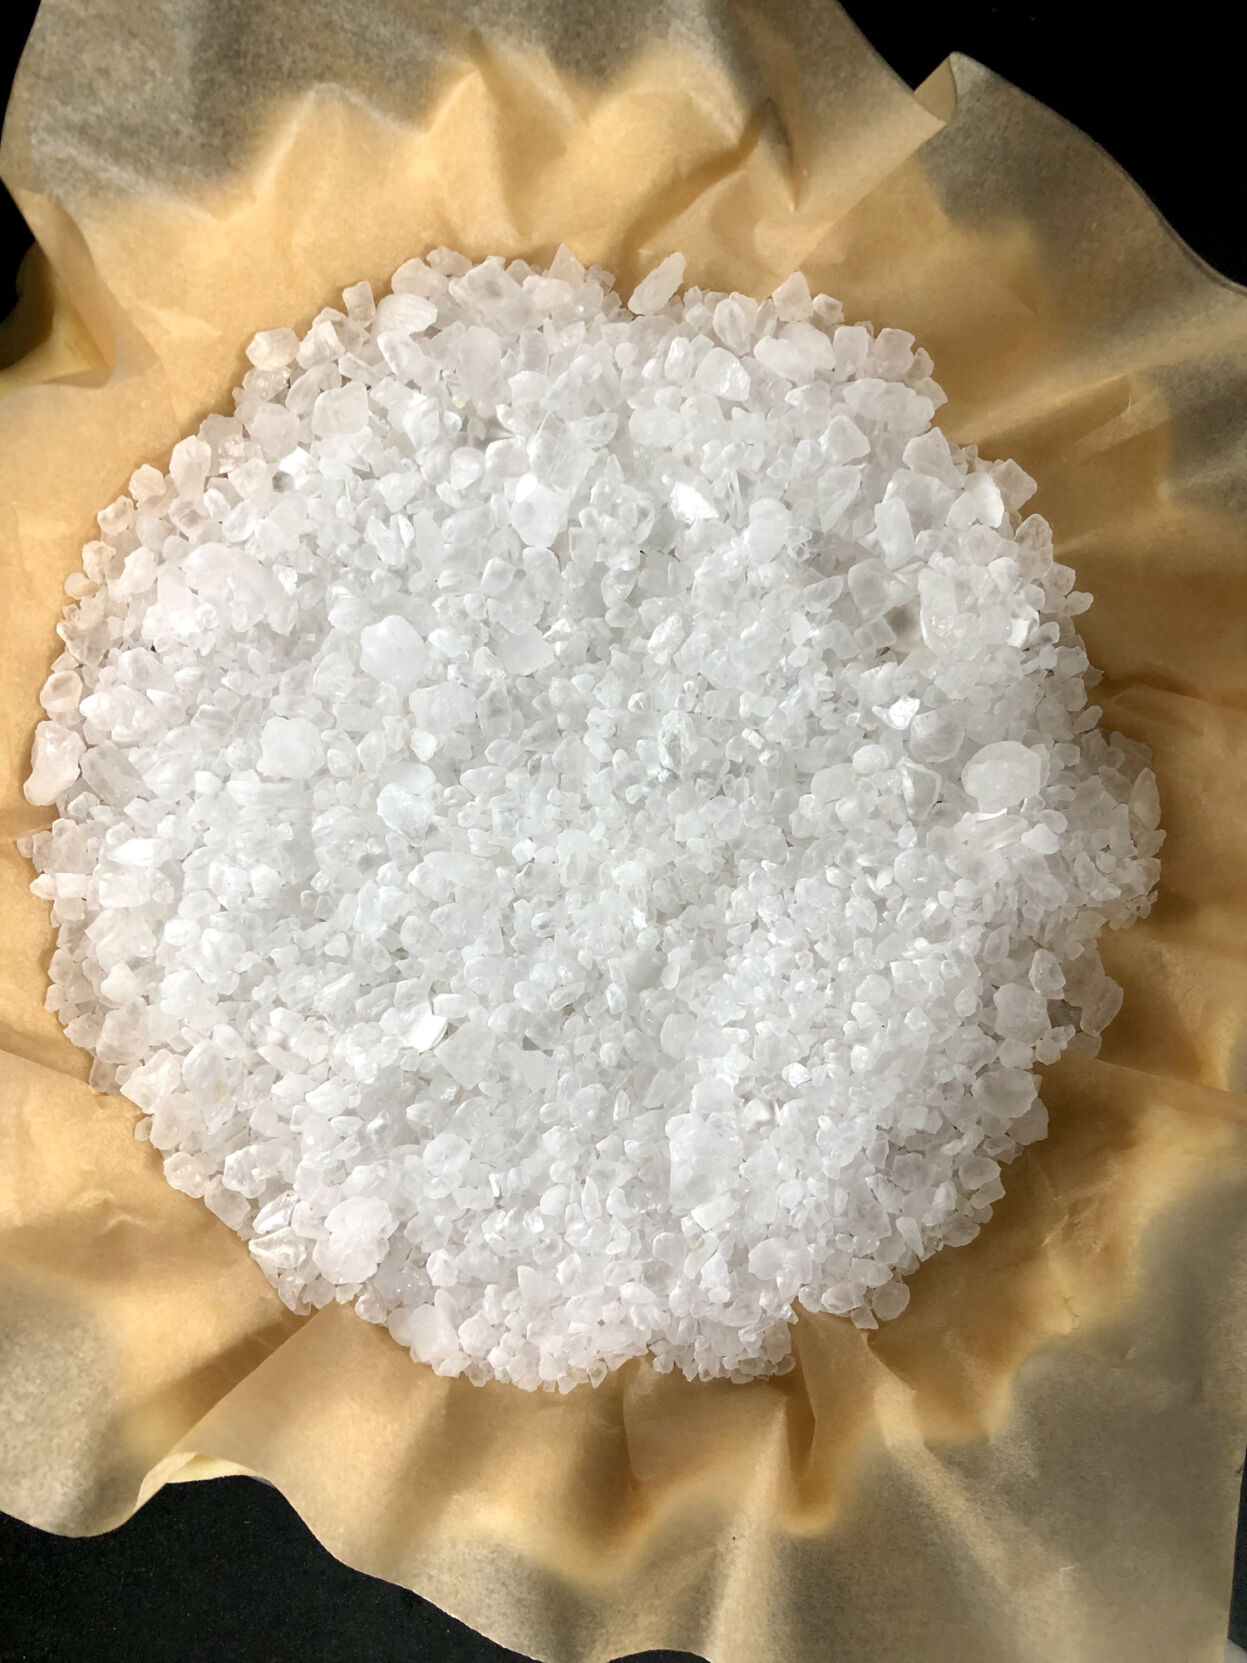
Baking the pie shell at a lower temperature allows the heat to penetrate the dough slowly so that it holds the fluted edge. During the pie shell's final baking period without the parchment and weights, the browning process can happen very quickly. As a result you will begin to smell the wonderful aromas of the buttery crust. Monitor it closely so it doesn’t over-bake and become bitter. My preference is to use rock salt or ceramic pie weights because neither break down while baking like dried beans. This means you can easily reuse them. When the dried beans break down during baking and you keep reusing them they begin to smell and conduct heat much faster.
Yields 1 9-inch pie
Pie Dough
1 1/3 cups unbleached all-purpose flour
1/4 teaspoon kosher salt
8 tablespoons (4 oz.) unsalted butter, cold
1/4 cup cold water
In the bowl of a stand mixer with a paddle attachment, add the flour and salt. Cut the cold butter into 1/4 inch thick slices and add to the top to the flour in the mixing bowl. Mix on low speed until the butter has cut into the flour forming a coarse meal. It should resemble the coarseness of cornmeal. The meal should also feel cold. Add 1/4 cup of water and continue mixing on low speed until all the ingredients have blended and it starts to form a few balls of dough. It’s important to stop the mixing before the dough forms one large ball, otherwise the dough may be overworked and become tough. Do not add additional water to this recipe, it will make the dough too soft and your fluted edge will not hold.
Turn the dough out onto a lightly floured smooth counter and gently gather into a ball. Dust the ball of dough with flour and gently shape into a round 6-inch pad. Place the dough on a plate and refrigerate for 10 minutes to relax the dough.
Dust the counter lightly with flour. Remove the dough from the refrigerator and place it on the center of the floured counter. Dust the top of the dough with flour. Center the rolling pin in the middle of the dough. Gently roll to the top and then to the bottom without lifting the pin from the dough. Continue rolling to the top and bottom until about a 9-inch-long oval is formed. Set the pin aside and lift the dough by sliding your hands held flat under the dough. Slide the dough against the floured table rotating it a quarter of a turn to a horizontal position. Dust the top with flour and center the rolling pin on the top. Roll the pin from the top to bottom as you did before to form a circle. If the dough is longer than the length of the pin, roll half the dough at a time. Check the bottom making sure that the dough doesn't stick to the counter. If it does dust with more flour. Roll around the outside edge where needed. Round the circle and even the dough to a 12-inch-circle. Brush flour from top and then gently fold in half. Brush flour from the bottom of the folded dough. Then do the same to the other half.
Once the flour has been brushed from the dough. Fold in half and cover half the pie pan, then unfold over the other half. Lift the edges so that the dough falls to the bottom of the pan. Press the dough gently against the pan. Lift, bringing the overlapping edge to the top lip of the pan creating a double layer of standing dough around the top of the pan. Gently squeeze this double layer together so that it stands up on top of the rim of the pie pan.
To flute the edge, space your right thumb and index finger about 1 inch apart. Position this hand inside the shell at the top of the double layered dough. Position your left thumb at the top outside edge of the rim of dough so that it is aligned across and in between your right index finger and thumb. Simultaneously press your positioned hands together forming a curve in the dough. Be careful not to pinch the dough, this doesn't give as good a definition. Move your right hand just above and then move your left hand across from and repeat the pressing. Continue this around the edge of the shell. Refrigerate for at least 30 minutes to chill and relax the dough.
Adjust an oven rack to the lowest level. Preheat the oven to 325°F.
Place the chilled pie pan on a counter. Using the tines of a salad fork, press holes into the flat bottom layer of dough spacing them about 1/2-inch apart. Cover with a 12-inch square piece of parchment paper. Gently press the parchment to the bottom and then press against the sloping sides. Fill with about 2 cups of weights such as rock salt, ceramic pie weights or dried beans. Press the weights up against the sides so that it slopes 3/4 of the way up. The parchment paper will extend above and beyond the edge of the pie pan. Bake for 35 minutes.
After baking remove the shell from the oven and place on a rack or heat proof surface. After a few minutes of cooling, hold the extended edges of the parchment paper with two hands. Lift the parchment and rock salt off and set aside to cool.
Increase the oven temperature to 350°F. Place the shell back into the oven and continue baking another 15-20 minutes until the bottom and edges of the dough are golden brown. Remove from the oven and place on a rack to cool. Once completely cooled, refrigerate to firm up the shell.
Filling
6 tablespoons sugar
1 tablespoon unbleached all-purpose flour
1 tablespoon cornstarch
1 extra large egg
1 extra large egg yolk
1½ cup milk
2 ounces unsalted butter
1 teaspoon pure vanilla extract
4 medium-size bananas, firm with slightly green ends
2 cups whipped cream
1 tablespoon confectioner’s sugar
Sift the sugar, flour, and cornstarch together into a mixing bowl. Add the egg and yolk, whisk until light and without lumps. Set aside until needed. Bring the milk to a boil in a heavy-bottomed saucepan. Whisk about 1/3 of the hot milk into the egg mixture until blended. Pour the egg mixture back into the pan with the remaining milk (this is known as tempering the eggs or warming them to prevent them from curdling when adding to the boiling milk). Cook over moderately high heat, stirring continuously with a wire whisk scraping the bottom and sides of the pan, until the center bubbles and the mixture has thickened like pudding.
Remove from the heat and whisk in the butter and vanilla. Continue whisking until the butter is melted and evenly incorporated. Pour into a large bowl and cover. Place on a rack to cool evenly for about 15 minutes.
Peel the bananas and cut them into 1/2-inch slices. After the pastry cream has cooled for 15 minutes, fold the bananas into the warm pastry cream. Spoon into the cooled pre-baked pie shell. Smooth the top of the filling until level. Whip the heavy cream and confectioner’s to firm peaks. Spoon or pipe the cream on top of the pie, covering the filling. Cover carefully and refrigerate until ready to serve.
To pipe the whipped cream, use a large #16 inch pastry bag and a #808 large plain pastry tip with an opening of 5/8 inches. Place the tip in the bag and make a collar on the large end. Holding the collar of the bag with one hand, fill with the whipped cream using a spoon or wide spatula. Once filled, unfold the top and twist the end to prevent the cream from escaping during piping. This is also the hand you will use to gently squeeze the pastry bag to release the whipped cream. Using your right hand, place the twist in the bag between your thumb and large finger. Close your hand to secure the twist and gently cup it around the top of the bag filled with whipped cream. Use your other hand to guide the tip when piping.
Keep the end of the pastry tip about 1 inch from the top of the filling while you pipe. Pipe the desired decoration on top until the banana filling is completely covered.


(0) comments
Welcome to the discussion.
Log In
Keep it Clean. Please avoid obscene, vulgar, lewd, racist or sexually-oriented language.
PLEASE TURN OFF YOUR CAPS LOCK.
Don't Threaten. Threats of harming another person will not be tolerated.
Be Truthful. Don't knowingly lie about anyone or anything.
Be Nice. No racism, sexism or any sort of -ism that is degrading to another person.
Be Proactive. Use the 'Report' link on each comment to let us know of abusive posts.
Share with Us. We'd love to hear eyewitness accounts, the history behind an article.