


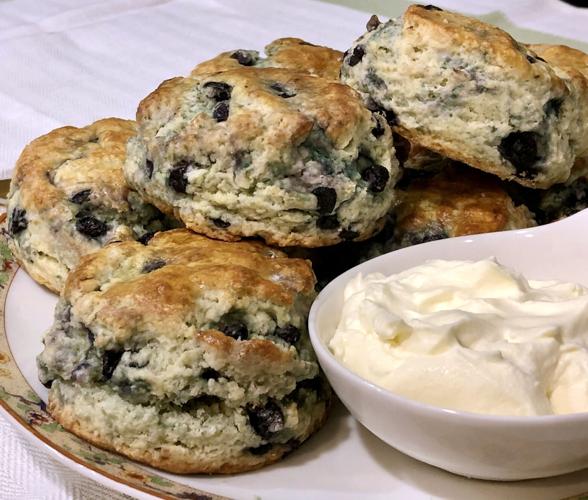
For the first three quarters of my career, spent in some of the finest hotels and museums in the world, scones were an important part of the menu. Originally only for afternoon tea, then they became more popular for breakfast and an in-between meal snack. True English scones are similar to American biscuits, tender but not as crumbly. The butter is cut into the flour forming smaller lumps and they are slightly sweet because in Great Britain they are spread with jam and rich clotted cream.
This is an ideal recipe for using up your winter supply of frozen blueberries. It's important that the dough is cold when baked for even shaping, otherwise they tend to spread. Plain scones are refrigerated for 20-30 minutes before baking. If you are using fresh berries, refrigerate them for one hour before making the recipe. This will keep the dough cold so you don’t need to refrigerate the scones before baking. Fresh or frozen wild blueberries have a more complex flavor and are higher in natural pectin. When choosing regular fresh blueberries, select the smaller ones which are usually more flavorful. Don’t bother adding vanilla extract or citrus zest, which will only dilute and not compliment the berries. However, if you find yourself with bland blueberries, consider a little bit of ground coriander; the floral tones will enhance their flavor. Keeping the butter cold makes it easier to work with the dough. It’s also important to keep your hands clean and dry when handling the dough. I usually wash and dry my hands at least 3 times when making this recipe.
Baking powder is activated by heat and liquid. Keep the lid on tight and stored in a cool, dark space. Never use a set spoon to measure! You can test baking powder by stirring 1/2 teaspoon into a glass of very hot tap water. It should immediately foam to the top like alka-seltzer, if it doesn’t then it’s dead.
The butter has to be cold. Keep the blueberries frozen. Do not thaw!
Keep your hands clean and dry when working with the dough. You can use a stand mixer with a paddle attachment to cut the butter into the flour, but I suggest you then take it off the mixer and finish the last steps by hand. A good substitute for clotted cream is to process heavy cream (only list ingredients should be heavy cream) until it looks like yogurt. Be careful not to over process, it's very fast and easy to make.
Yields about 8-9
1 cup blueberries, frozen or fresh
2 extra large eggs, one is for the glaze
1/2 cup half&half
2 cups unbleached all-purpose flour
1/4 cup granulated sugar
1 tablespoon baking powder
1/4 teaspoon salt
4 ounces unsalted butter, cold
Adjust oven rack to the middle level and preheat to 425°F. Line a baking sheet with parchment paper or a silicone baking sheet.
Measure the blueberries and keep refrigerated until needed.
Beat 1 egg until smooth, then stir in the half&half, set aside. In another bowl beat the other egg until smooth, set aside for glazing the scones.
Measure flour into a medium size bowl, then add the sugar, baking powder and salt. Use your hands to blend the dry ingredients. At first you will feel the coarse sugar and salt, then within 30 seconds everything feels the same. Notice the white color of the flour mixture.
Cut the cold butter into 18 slices, each about 1/4 inch thick. Add to the flour mixer and toss with your fingers to coat with the flour.
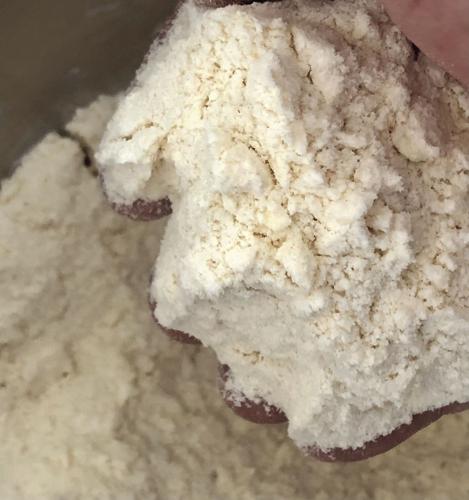
Keeping the cold butter slices coated with flour, press them between the ends of your thumbs against your fingertips a few times, then release and do the same with all the butter rotating through the butter slices for even blending. Work steady with moderate pressure. After about 6-7 minutes it will have taken on the golden color of the butter and developed into a coarse meal with small lumps of butter, as in the image with cupped hand. Add the still frozen blueberries and blend evenly.
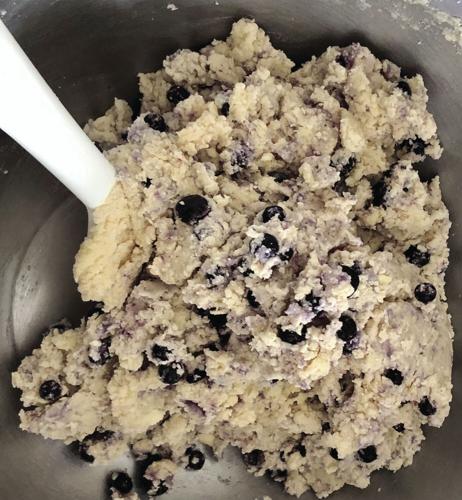
Form a well in the center, then pour in the beaten egg and half&half. Using a long handled spatula, start at the edge of the bowl and stir the flour to the center liquid. Repeat this method only until all the dry ingredients are incorporated, when it just starts to clump to form a dough as in the image above. Stop stirring so you don’t over mix! Coat your hands with flour and gently press the dough into the bowl. Turn out on to a moderately floured surface.
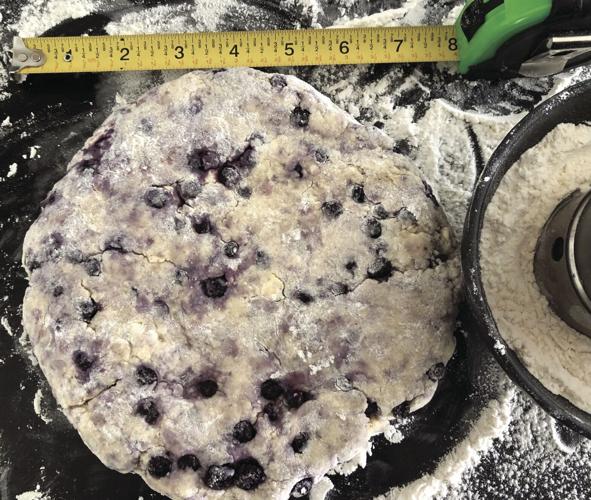
Lightly dust the top of the dough with flour, coat your hands with flour and press the dough into a round 7-inch circle, 1 inch high. Continue gently pressing the dough, making the top and side slightly smooth and evenly shaped. With a circular motion gently glide the dough into the counter flour coating the bottom, to ensure it isn’t sticking to the surface.
Fill a small shallow bowl with 1/2 cup of extra flour. Place a 2-1/2 inch cutter or glass in the flour. Starting at the edge cut into circles, dipping the cutter into the flour before each cut. Space evenly on the prepared pan. Without using any flour gently press the scraps of dough together into a round pad 1 inch high. Cut one more and shape any remaining pieces into another pad.
Dip a brush into the remaining beaten egg and tap against the bowl so you have a controlled amount of egg on the brush. Brush each top back and forth 10 times without allowing the egg to run down the sides of the bowl.
Place in the preheated oven and reduce the temperature to 400°F. After 8 minutes rotate the pan from from to back for even baking and 7 minutes, for a total baking time of 15 minutes.
Place the pan on a rack to cool. Once cooled, store in an airtight container. They will last three days, however they are best eaten the day baked.


(0) comments
Welcome to the discussion.
Log In
Keep it Clean. Please avoid obscene, vulgar, lewd, racist or sexually-oriented language.
PLEASE TURN OFF YOUR CAPS LOCK.
Don't Threaten. Threats of harming another person will not be tolerated.
Be Truthful. Don't knowingly lie about anyone or anything.
Be Nice. No racism, sexism or any sort of -ism that is degrading to another person.
Be Proactive. Use the 'Report' link on each comment to let us know of abusive posts.
Share with Us. We'd love to hear eyewitness accounts, the history behind an article.